


The torch.linspace() method creates a one-dimensional tensor of size “steps” (provided by the user), evenly spaced elements between the inclusive start and end points.
Even spaced meaning values are spaced as (end – start) / (steps – 1). It uses 100 points if the “steps” argument is unspecified.
The use cases of the .linspace() function are for generating a sequence that requires uniform spacing, defining grid points, or interpolating values.
Function signature
torch.linspace(start,
              end,
              steps,
              out=None,
              dtype=None,
              layout=torch.strided,
              device=None,
              requires_grad=False)
Parameters
| Argument | Description |
| start (float or Tensor) | It specifies the starting value of the sequence. It is of type float or Tensor. If it is a Tensor, it must be a 1D tensor. |
| end (float or Tensor) | It specifies the ending value of the sequence, and it is inclusive. It can be of type float or Tensor. If Tensor, it must be a 1D tensor. |
| steps (int) | It is of type integer. It specifies the total number of points to generate between the start and ending points. It must be a positive integer. You can define it as the size of the newly constructed tensor. |
| out (Tensor, optional) | If you have a pre-allocated tensor, you can store the newly constructed tensor in this pre-allocated tensor using the “out” argument. |
| dtype (torch.dtype, optional) |
It defines the data type of the output tensor. By default, it is inferred from the inputs. |
| layout (torch.layout, optional) | It defines the layout of the output tensor. By default, it is torch.strided. |
| device (torch.device, optional) | The device can be “CPU” or “cuda”, depending on your environment configuration. |
| requires_grad (bool, optional) | By default, it is False, but if True, it tracks gradients and supports backpropagation. |
Generating linearly spaced points
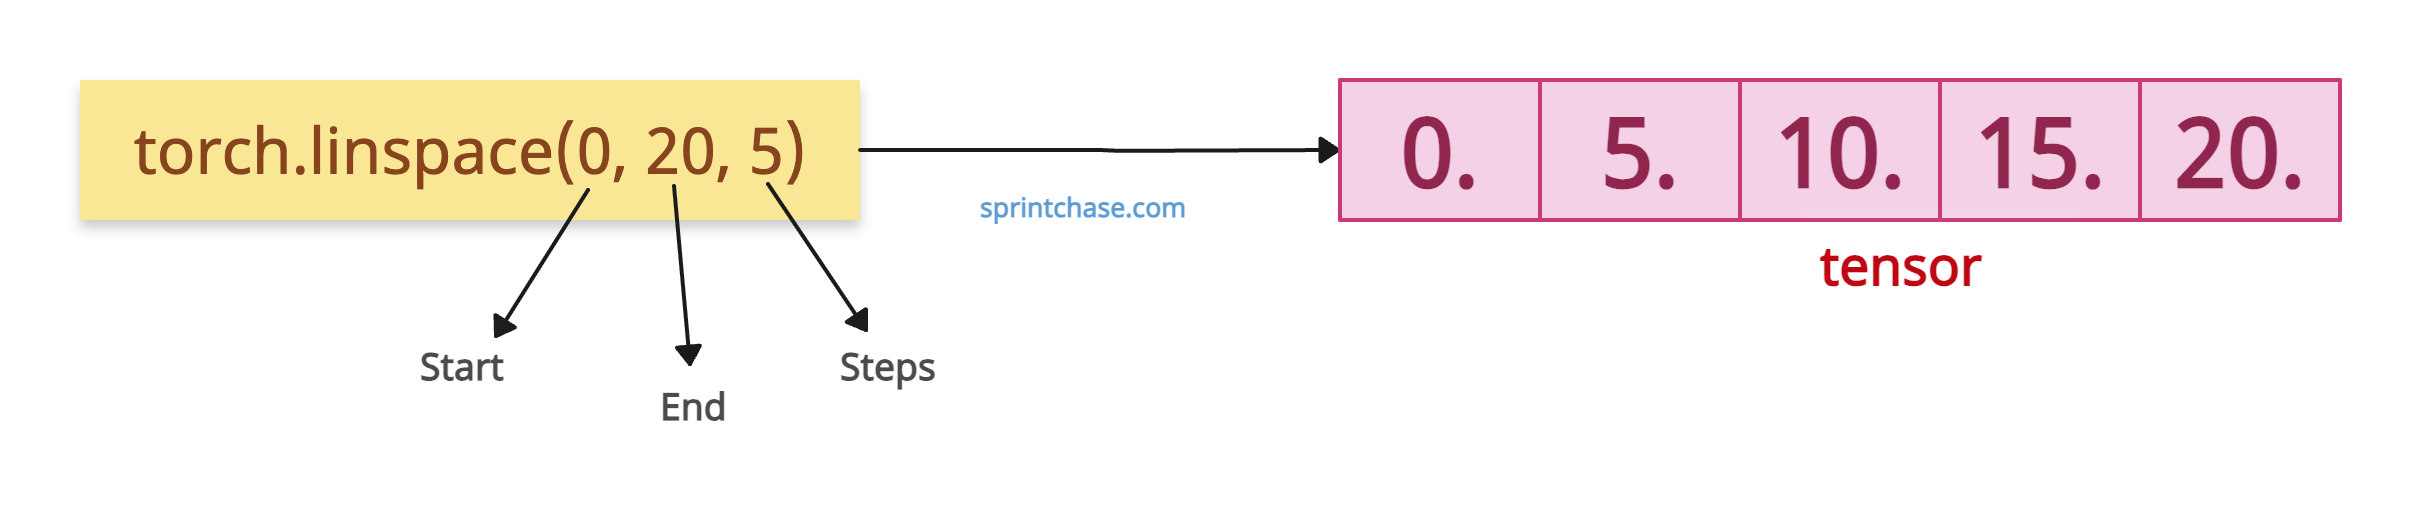
Let’s create five evenly spaced points from 0 to 20.
import torch

tensor = torch.linspace(0, 20, 5)

print(tensor)

# Output: tensor([ 0.,  5., 10., 15., 20.])
We can calculate the step size using this formula: (20 – 0) / (5 – 1) = 5. The tensor includes both start and end. The above output shows the step size = 5.
Single point edge case

If you pass the steps = 1, it returns a tensor containing only the [start] point.
import torch

tensor = torch.linspace(0, 20, 1)

print(tensor)

# Output: tensor([ 0.])
The above output shows that it returns only the first element of the sequence because the step size is just 1.
What if steps = 0
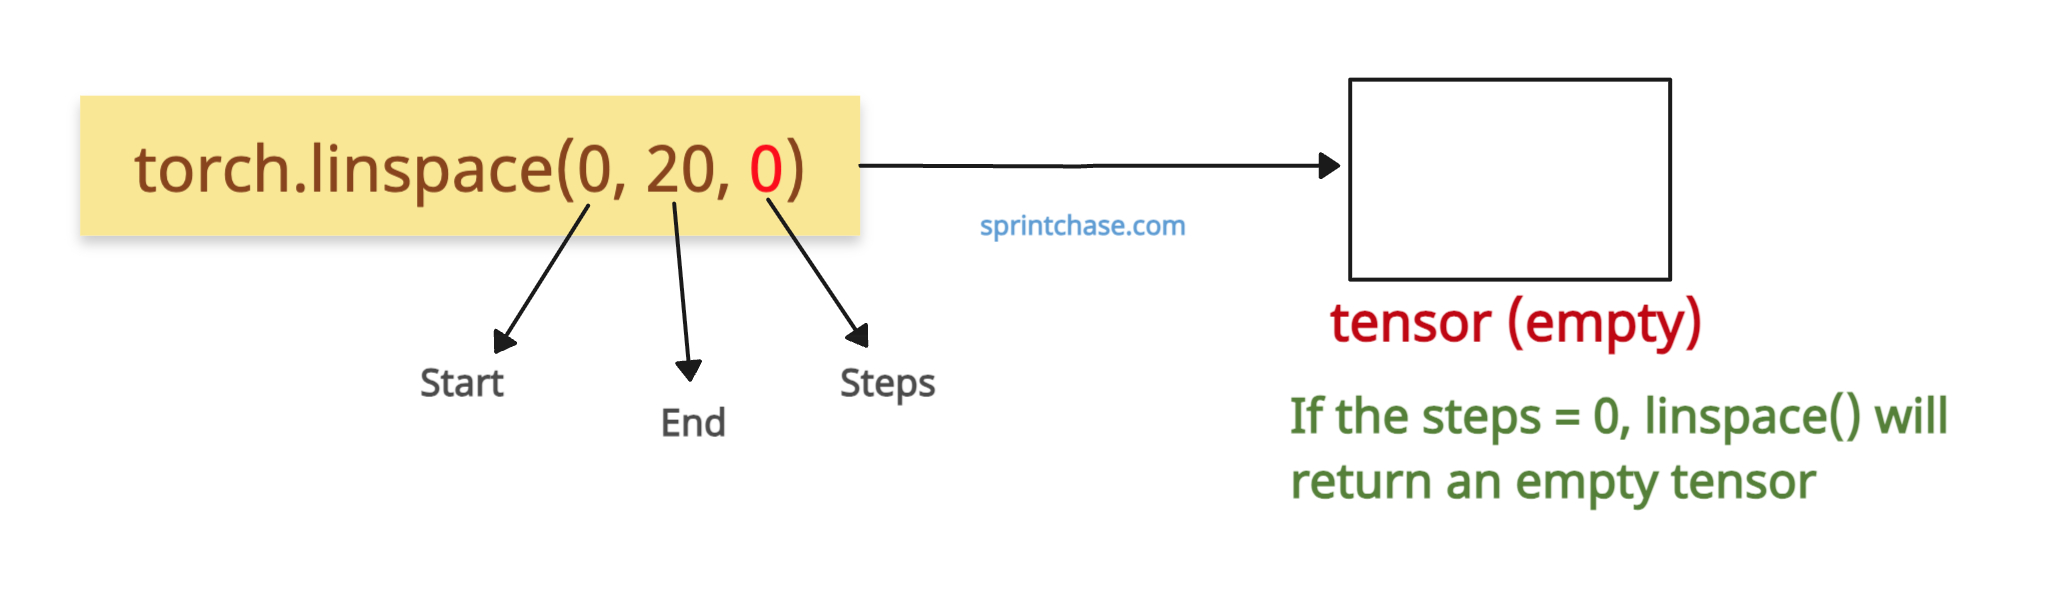
If you pass the steps = 0, it will return an empty tensor. It does not throw any RuntimeError now.
import torch

tensor = torch.linspace(0, 20, 0)

print(tensor)

# Output: tensor([])
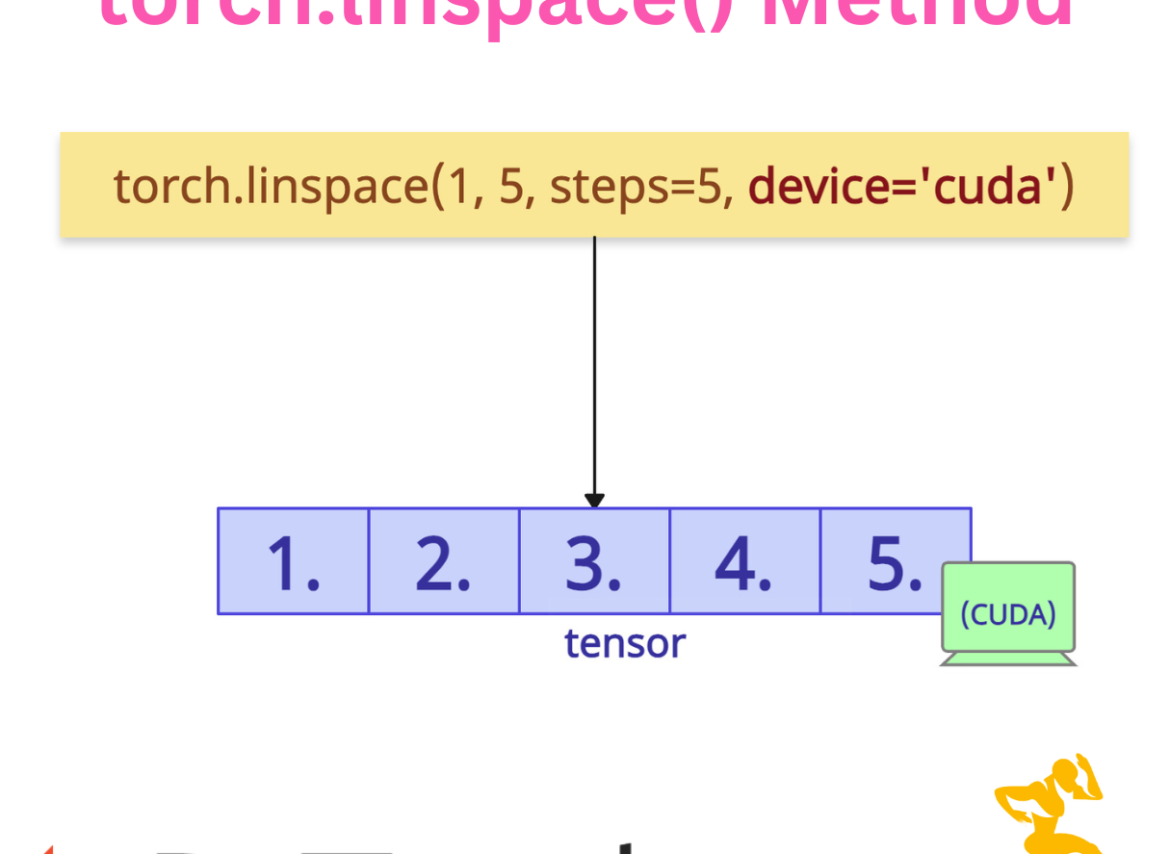
Specifying device
Let’s create a tensor on the GPU for faster computations by passing the “device” argument with a “cuda” value.
import torch

cuda_tensor = torch.linspace(1, 5, steps=5, device='cuda')

print(cuda_tensor)
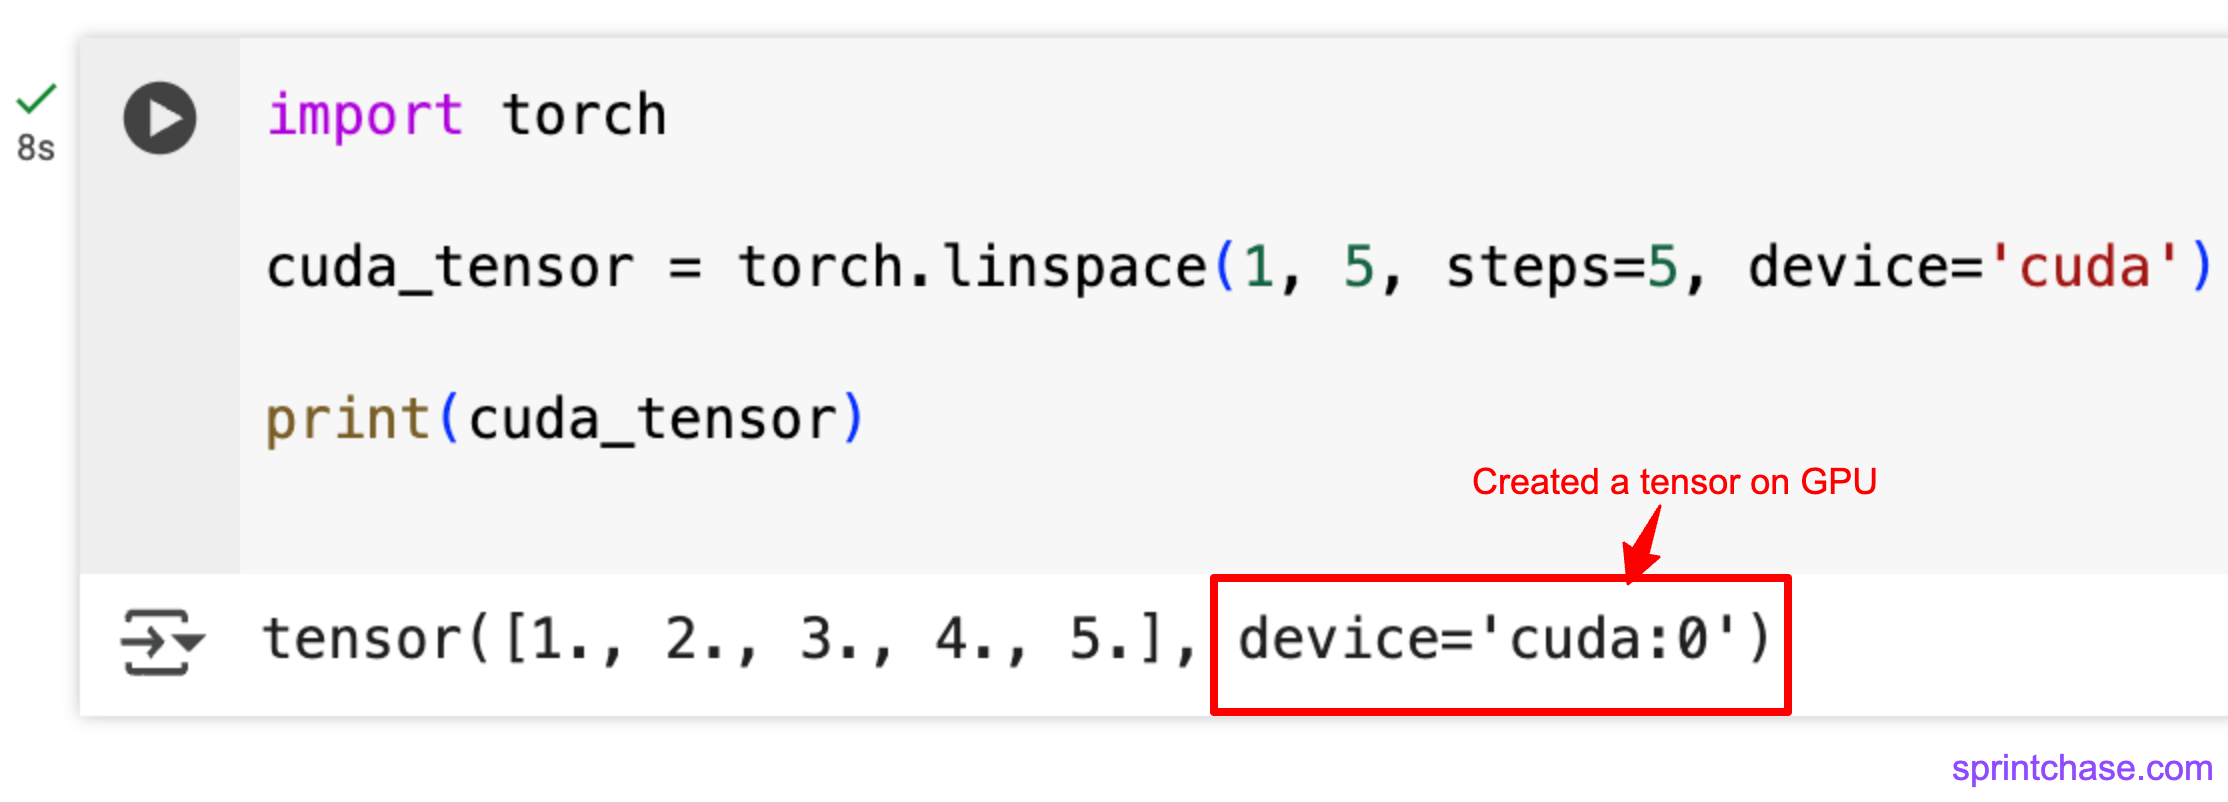
The above screenshot shows the proof that we can create a tensor on a GPU.
Specifying data type
Let’s generate 3 points from 1 to 5 with integer dtype.
import torch

tensor = torch.linspace(1, 5, 3, dtype=torch.int32)

print(tensor)

# Output: tensor([1, 3, 5], dtype=torch.int32)
You can see that the output tensor type is torch.int32.
Gradient Tracking
You can enable backpropagation by passing the “requires_grad=True” argument.
import torch

backpropagate_tensor = torch.linspace(1, 5, steps=5, device='cuda', requires_grad=True)

print(backpropagate_tensor)
Output to a pre-allocated Tensor
You can create a pre-allocated tensor using torch.empty() function and assign the value of the newly constructed evenly spaced tensor to this pre-defined tensor using the “out” argument.
import torch

pre_allocated_tensor = torch.empty(3)

torch.linspace(0, 3, steps=3, out=pre_allocated_tensor)

print(pre_allocated_tensor)

# Output: tensor([0.0000, 1.5000, 3.0000])
Comparison with torch.arange()
The torch.arange() method also generates a sequence of tensors, but it uses step size, not the number of points.
import torch

linspace_tensor = torch.linspace(0, 8, steps=5)
print(linspace_tensor)
# Output: tensor([0., 2., 4., 6., 8.])

arange_tensor = torch.arange(0, 10, 2)
print(arange_tensor)
# Output: tensor([0, 2, 4, 6, 8])

print(linspace_tensor.equal(arange_tensor))
# Output: True
Despite their different construction methods and default types, both tensors contain the same values and shape, so the .equal() returns True.
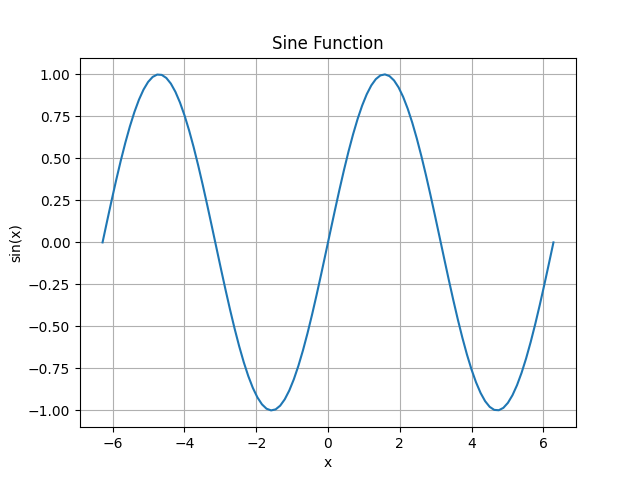
Plotting
Let’s generate points for a sine plot and display the sine wave on the plot using the matplotlib library.
import torch
import matplotlib.pyplot as plt

x = torch.linspace(-2*torch.pi, 2*torch.pi, 100)
y = torch.sin(x)

plt.plot(x.numpy(), y.numpy())

plt.title("Sine Function")
plt.xlabel("x")
plt.ylabel("sin(x)")

plt.grid(True)

plt.savefig("sine_plot.png")
In your current working directory, one image has been saved called “sine_plot.png” that looks like the screenshot below:
 That’s it!